Try Kunobi 🎮
The Demo Cluster feature allows you to create a fully functional local Kubernetes environment with pre-configured applications. It's perfect for learning Kubernetes, testing Kunobi's features, or experimenting with GitOps workflows—all without requiring cloud infrastructure.
Getting Started
From the home page, click on Dev Clusters in the sidebar to access the cluster management page:
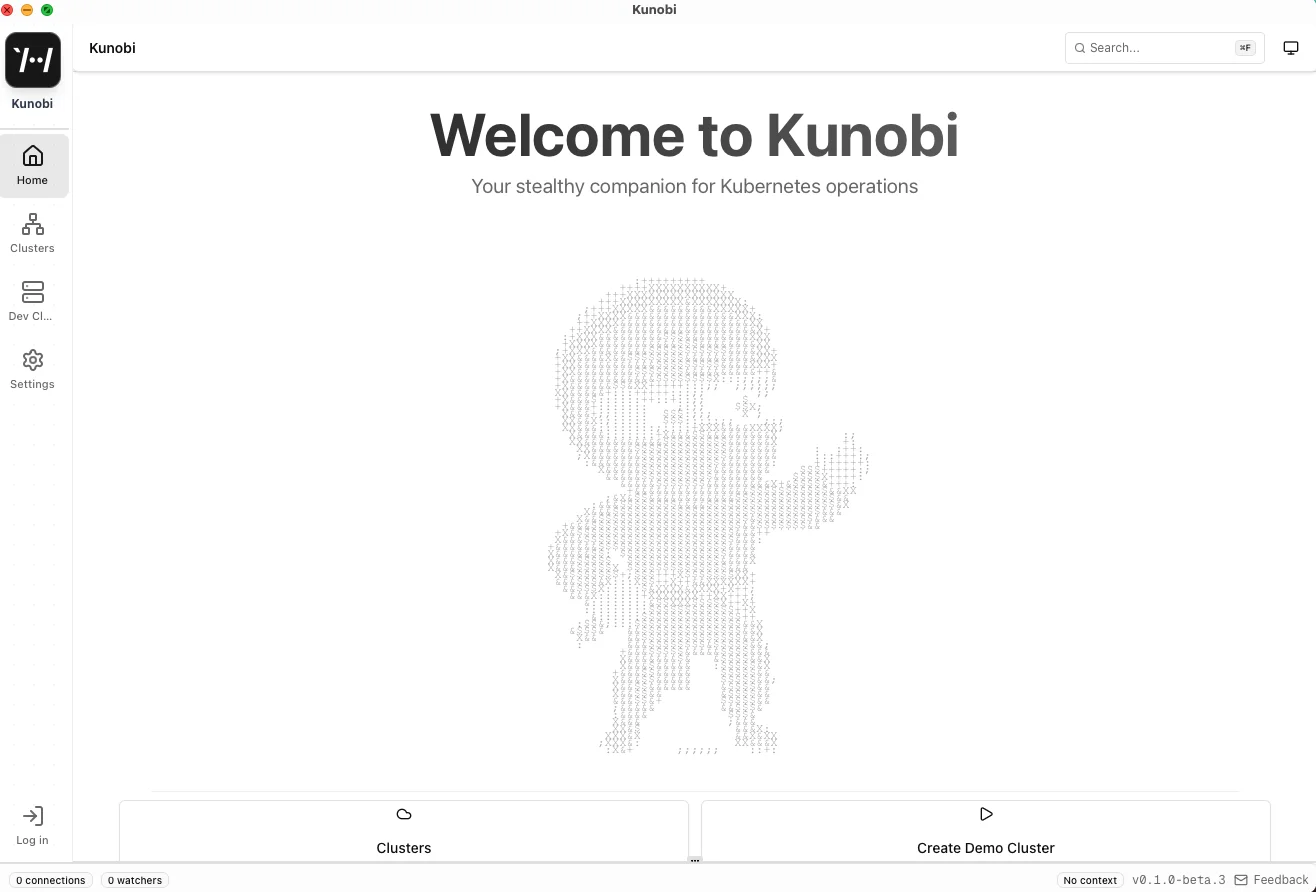
Prerequisites
Before creating a demo cluster, you'll need to install the following dependencies:
- Docker - System dependency for running containers
- mise - Tool version manager (install from mise.jdx.dev)
- kind - Kubernetes in Docker (install via:
mise use kind) - kubectl - Kubernetes command-line tool (install via:
mise use kubectl) - helm - Kubernetes package manager (install via:
mise use helm)
Kunobi will automatically check for these dependencies and guide you through installation if any are missing.
Navigating to Dev Clusters
Click on Dev Clusters in the sidebar to access the cluster management page.
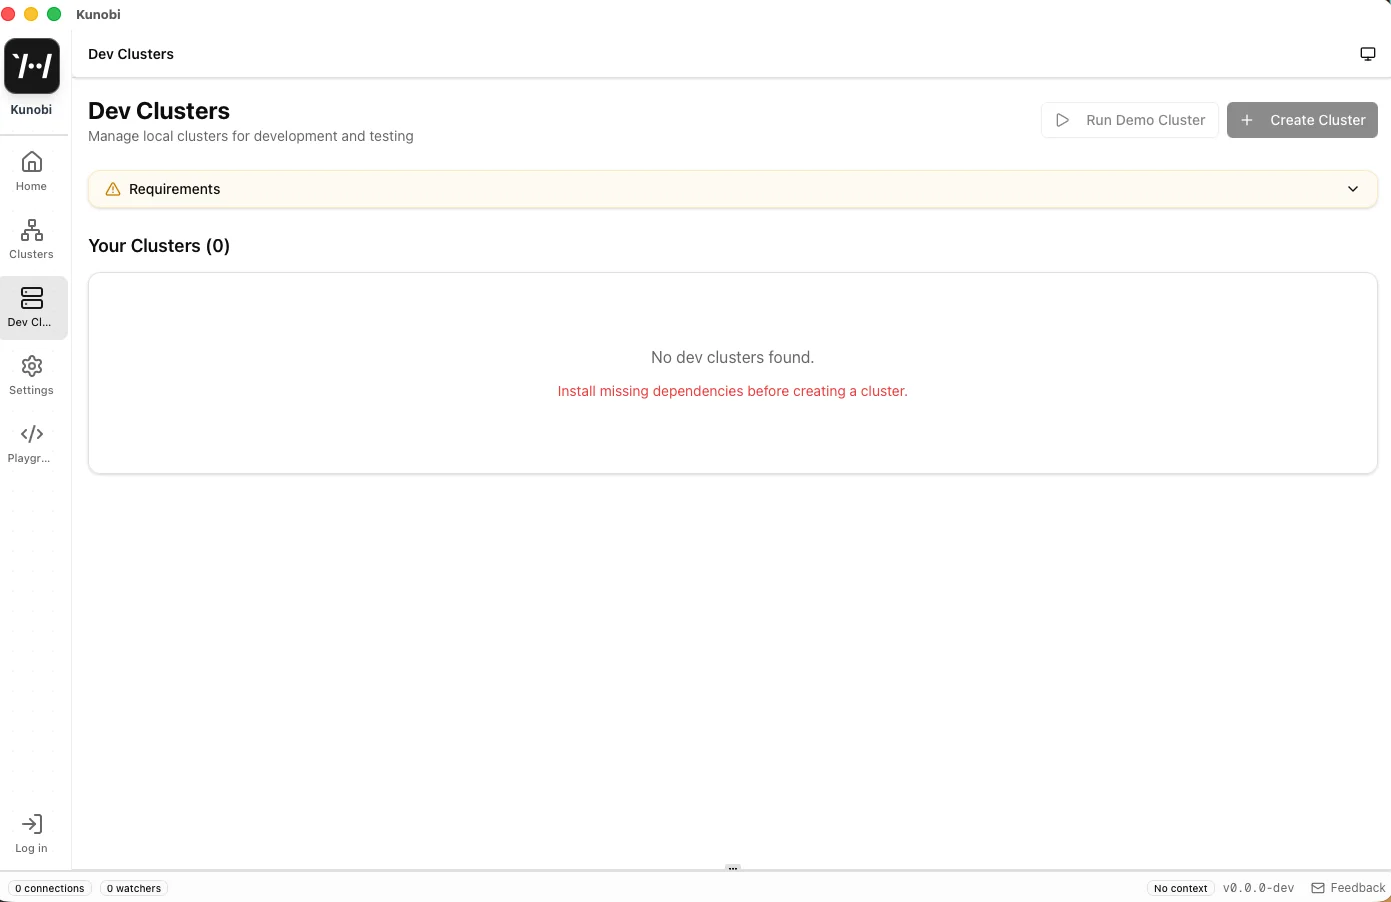
When Dependencies Are Missing
If you haven't installed the required dependencies, you'll see this screen:
Click on Requirements to expand the dependency checker:
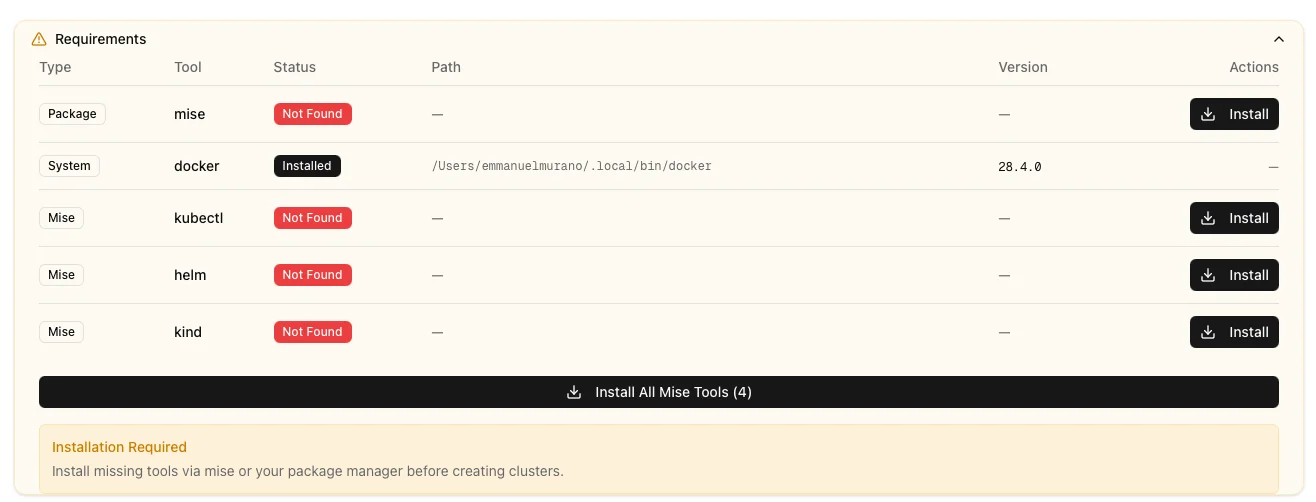
For mise and Kubernetes tools (kind, kubectl, helm):
- Click the Install button next to each missing tool
- Kunobi will install them automatically for you
- No manual terminal commands needed!
For Docker:
- Docker must be installed manually from docker.com
- Restart Kunobi after installing Docker
After Installing Dependencies
Once all dependencies are installed, the Requirements panel shows a success message:

You can now collapse the Requirements panel to see the empty state:

Creating a Demo Cluster
Using Run Demo Cluster
The fastest way to get started is using the Run Demo Cluster button:
- Click Run Demo Cluster in the top right corner
- A pre-configured cluster will be created with:
- Cluster name:
demo-cluster - Metrics Server enabled
- FluxCD GitOps enabled
- Pre-deployed demo applications
- Cluster name:
Using Create Cluster (Custom Configuration)
For more control, use the Create Cluster button:
- Click Create Cluster in the top right corner
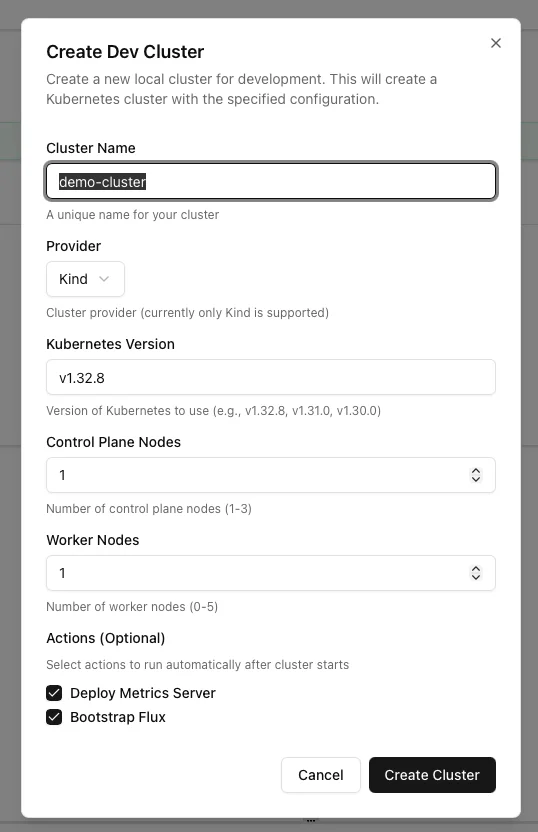
- The cluster creation dialog will appear:
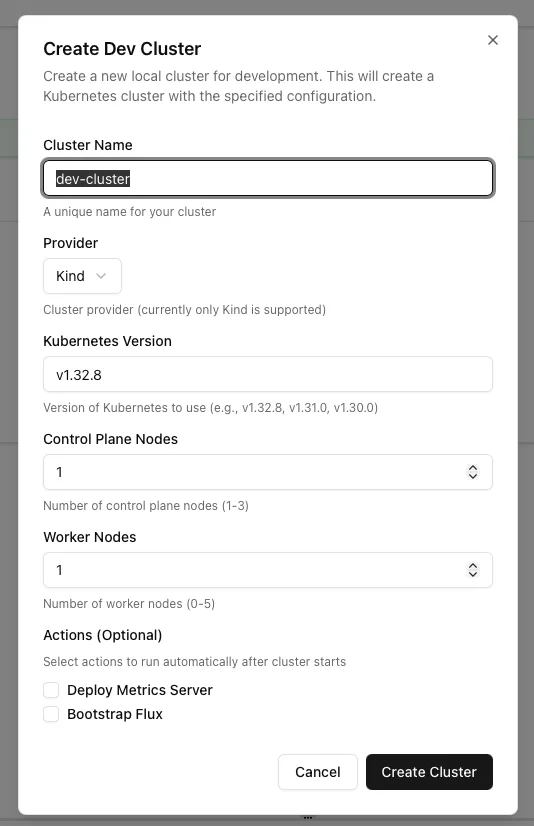
- Configure your cluster:
- Cluster Name: A unique name for your cluster (e.g.,
demo-cluster) - Provider: Kind (currently the only supported provider)
- Kubernetes Version: Choose the K8s version (e.g., v1.32.8)
- Control Plane Nodes: Number of control plane nodes (1-3)
- Worker Nodes: Number of worker nodes (0-5)
- Actions (Optional):
- ☑️ Deploy Metrics Server: Enables resource monitoring
- ☑️ Bootstrap Flux: Sets up GitOps with demo applications
- Cluster Name: A unique name for your cluster (e.g.,
- Click Create Cluster
Cluster Creation Process
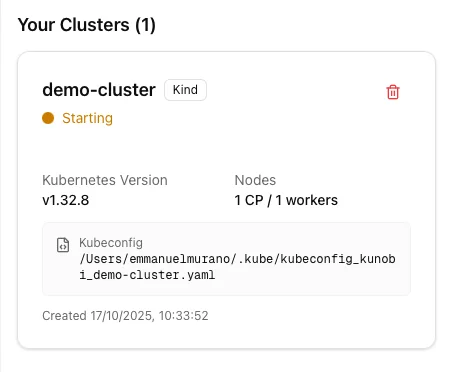
Starting
After clicking Create Cluster, the cluster card appears with a "Starting" status:
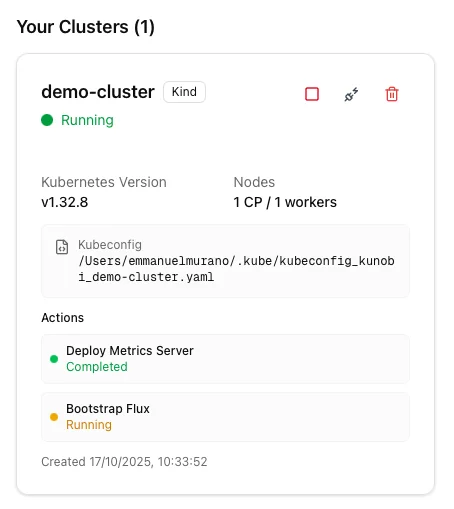
Running with Actions
Once the cluster starts, the actions (Metrics Server and Bootstrap Flux) begin running:
Actions Complete
When all actions finish, you'll see:
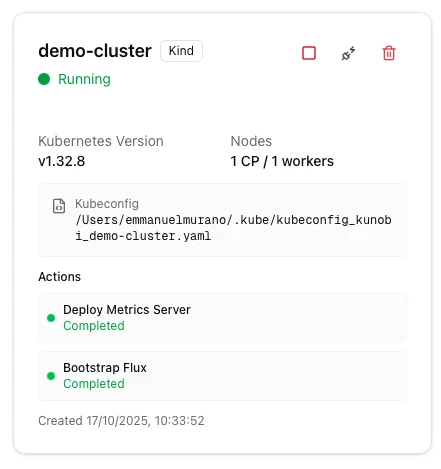
The cluster is now fully operational! You can see:
- ✅ Deploy Metrics Server: Completed
- ✅ Bootstrap Flux: Completed
What Gets Created
When you create a demo cluster, Kunobi sets up:
Infrastructure
Local Kubernetes Cluster
- Provider: Kind (Kubernetes in Docker)
- Kubernetes Version: v1.32.8 (configurable)
- 1 control plane node (configurable 1-3)
- 1 worker node (configurable 0-5)
- Cluster name: customizable
System Components
Metrics Server
- Namespace:
kube-system - Enables resource monitoring (CPU and memory usage)
- Pre-configured for local Kind clusters
- Allows you to view real-time pod and node resource consumption
FluxCD GitOps System
- Namespace:
flux-system - Automatically syncs applications from Git
- Monitors the demo repository every 5 minutes
- Source: github.com/Zondax/flux-demo
Demo Applications
The cluster automatically deploys two sample applications:
my-app1
- Namespace:
my-app1 - Replicas: 2 pods
- Image: Alpine Linux
- Function: Logs timestamps every 30 seconds
- Includes: Kubernetes Secret for configuration
- Resources: Minimal (10m CPU / 8Mi memory per pod)
my-app2
- Namespace:
my-app2 - Replicas: 3 pods
- Image: Alpine Linux
- Function: Logs timestamps every 30 seconds
- Includes: Kubernetes Secret for configuration
- Resources: Minimal (10m CPU / 8Mi memory per pod)
Managing Clusters
Cluster Actions
Each cluster card has three action buttons:

Hover over the buttons to see the available actions:
Stop cluster:

Connect to cluster:

Delete cluster:

Stopping a Cluster
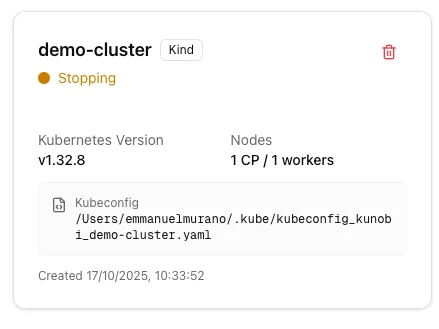
- Click the Stop button on the cluster card
- The cluster status changes to "Stopping":
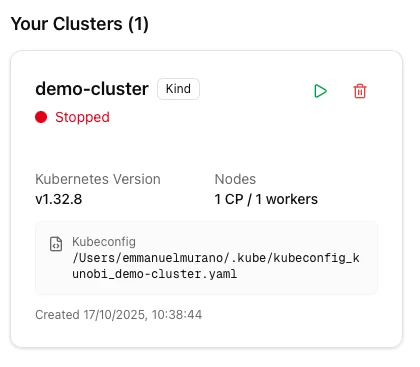
- Once stopped, the status shows "Stopped":
- The cluster metadata is preserved
- You can restart it later with the same configuration by clicking the play button
Deleting a Cluster
To completely remove a cluster:
- Click the Delete button on the cluster card
- Confirm the deletion in the dialog:
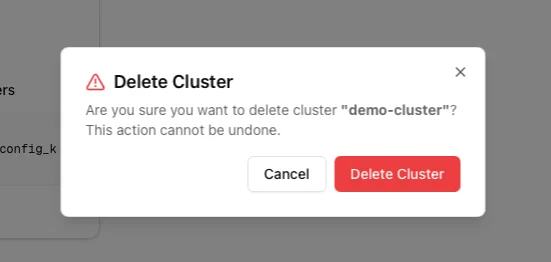
- The cluster, kubeconfig, and all metadata will be removed
Note: This action cannot be undone. Any work in the cluster will be lost.
Verifying in Docker Desktop
You can verify that your Kind cluster is running by checking Docker Desktop:

You should see containers running for:
demo-cluster-control-plane- The control plane nodedemo-cluster-worker- The worker node
What You Can Do
Once your demo cluster is running and connected:
Explore Resources
- View pods, deployments, services, and secrets across all namespaces
- Inspect resource details and configurations
- Watch real-time updates as Flux reconciles changes
Monitor Health
- See CPU and memory usage via the Metrics Server
- Track pod restarts and health status
- Monitor node resource consumption
Experience GitOps
- Observe Flux automatically deploying applications
- Watch the reconciliation process in real-time
- See how changes in Git propagate to your cluster
Learn Kunobi
- Test all of Kunobi's features in a safe environment
- Experiment with different views and workflows
- Practice Kubernetes operations without affecting production systems
Managing Multiple Clusters
You can create multiple demo clusters simultaneously:
- Click "Create Cluster" (not "Run Demo Cluster")
- Choose a unique cluster name (e.g.,
demo-cluster-2) - Configure the cluster settings as needed
- Select which actions to enable (Metrics Server and/or Flux)
All clusters can be connected and managed at the same time, allowing you to:
- Compare different configurations
- Test multi-cluster scenarios
- Switch between clusters seamlessly
Troubleshooting
Dependencies Not Found
If you see missing dependencies in the Requirements panel, follow the installation guidance above. Kunobi will automatically install mise and Kubernetes tools (kind, kubectl, helm) for you.
Alternatively, you can install tools manually via terminal:
# Install mise
curl https://mise.run | sh

# Install Kubernetes tools
mise use kind kubectl helm
Cluster Won't Start
- Check that Docker is running
- Ensure no other services are using the required ports
- Try deleting and recreating the cluster
Actions Failed
If Metrics Server or Flux installation fails:
- Check the action logs in the cluster card
- Verify internet connectivity (needed to download components)
- Retry the action using the retry button
Connection Issues
If you can't connect to a running cluster:
- Ensure the cluster status shows "Running"
- Check that the kubeconfig file exists at
~/.kube/kubeconfig_kunobi_demo-cluster.yaml - Try disconnecting and reconnecting from Kunobi
Next Steps
Once you're comfortable with the demo cluster, you can:
- Connect to your own Kubernetes clusters
- Set up GitOps workflows for your applications
- Explore advanced Kunobi features with production clusters
The demo cluster provides a perfect sandbox to learn and experiment before working with production infrastructure.